> ## Documentation Index
> Fetch the complete documentation index at: https://docs.dataspike.io/llms.txt
> Use this file to discover all available pages before exploring further.
# Quickstart Guide
> Get your Dataspike API keys, set up sandbox and production environments, test your first request, and start building with identity and compliance APIs.
## 1. Get your API keys
Create an account at [dash.dataspike.io](https://dash.dataspike.io).
All integrations in Dataspike require authenticated API access.\
You’ll manage your keys from the **[API](https://dash.dataspike.io/api).** tab in the dashboard, where you can switch between **Sandbox** and **Production** environments.
| Environment | Base URL | Description |
| -------------- | --------------------------------- | --------------------------------------------------------------------------------------------------- |
| **Sandbox** | `https://sandboxapi.dataspike.io` | Use for testing integrations and running simulated verifications without affecting production data. |
| **Production** | `https://api.dataspike.io` | Use for live verifications and real applicant data once your integration is ready. |
Each environment has its **own API key** — they are not interchangeable.\
When you switch environments in the dashboard, all internal entities (such as **Applicants**, **Verifications**, and **Screenings**) will update to reflect the selected context.
In the same **API** tab, you can also configure and test **webhook endpoints** for different event types (e.g. `verification.completed`, `aml.match_found`).\
The dashboard provides webhook delivery logs and replay options, so you can inspect request payloads and verify endpoint responses for each environment.
 > The **API tab** lets you switch between Sandbox and Production environments, view keys, and configure webhooks.
***
## 2. Configure a webhook (optional)
Dataspike uses **webhooks** to send real-time event notifications when key actions occur — for example, when a document verification completes, an AML screening match is detected, or a KYT wallet check finishes.
To configure a webhook:
1. Go to **Dashboard → API → Webhooks**.
2. Click **Add Endpoint** and enter your listener URL, e.g. `https://api.yourdomain.com/dataspike/webhook`.
3. Select the event types you want to receive, such as:
* `Document Verification`
* `AML Screening`
* `KYT Wallet Check`
4. **Enable** the webhook to start receiving events.
5. Use the **Test** button to send a dummy event and confirm your endpoint is working successfully.
Webhook requests include an identifying header containing the webhook internal ID, which allows you to trace each delivery and verify that it originates from Dataspike.\
You can view delivery logs, inspect payloads, and replay events directly from the dashboard to test or troubleshoot your integration.
> The **API tab** lets you switch between Sandbox and Production environments, view keys, and configure webhooks.
***
## 2. Configure a webhook (optional)
Dataspike uses **webhooks** to send real-time event notifications when key actions occur — for example, when a document verification completes, an AML screening match is detected, or a KYT wallet check finishes.
To configure a webhook:
1. Go to **Dashboard → API → Webhooks**.
2. Click **Add Endpoint** and enter your listener URL, e.g. `https://api.yourdomain.com/dataspike/webhook`.
3. Select the event types you want to receive, such as:
* `Document Verification`
* `AML Screening`
* `KYT Wallet Check`
4. **Enable** the webhook to start receiving events.
5. Use the **Test** button to send a dummy event and confirm your endpoint is working successfully.
Webhook requests include an identifying header containing the webhook internal ID, which allows you to trace each delivery and verify that it originates from Dataspike.\
You can view delivery logs, inspect payloads, and replay events directly from the dashboard to test or troubleshoot your integration.
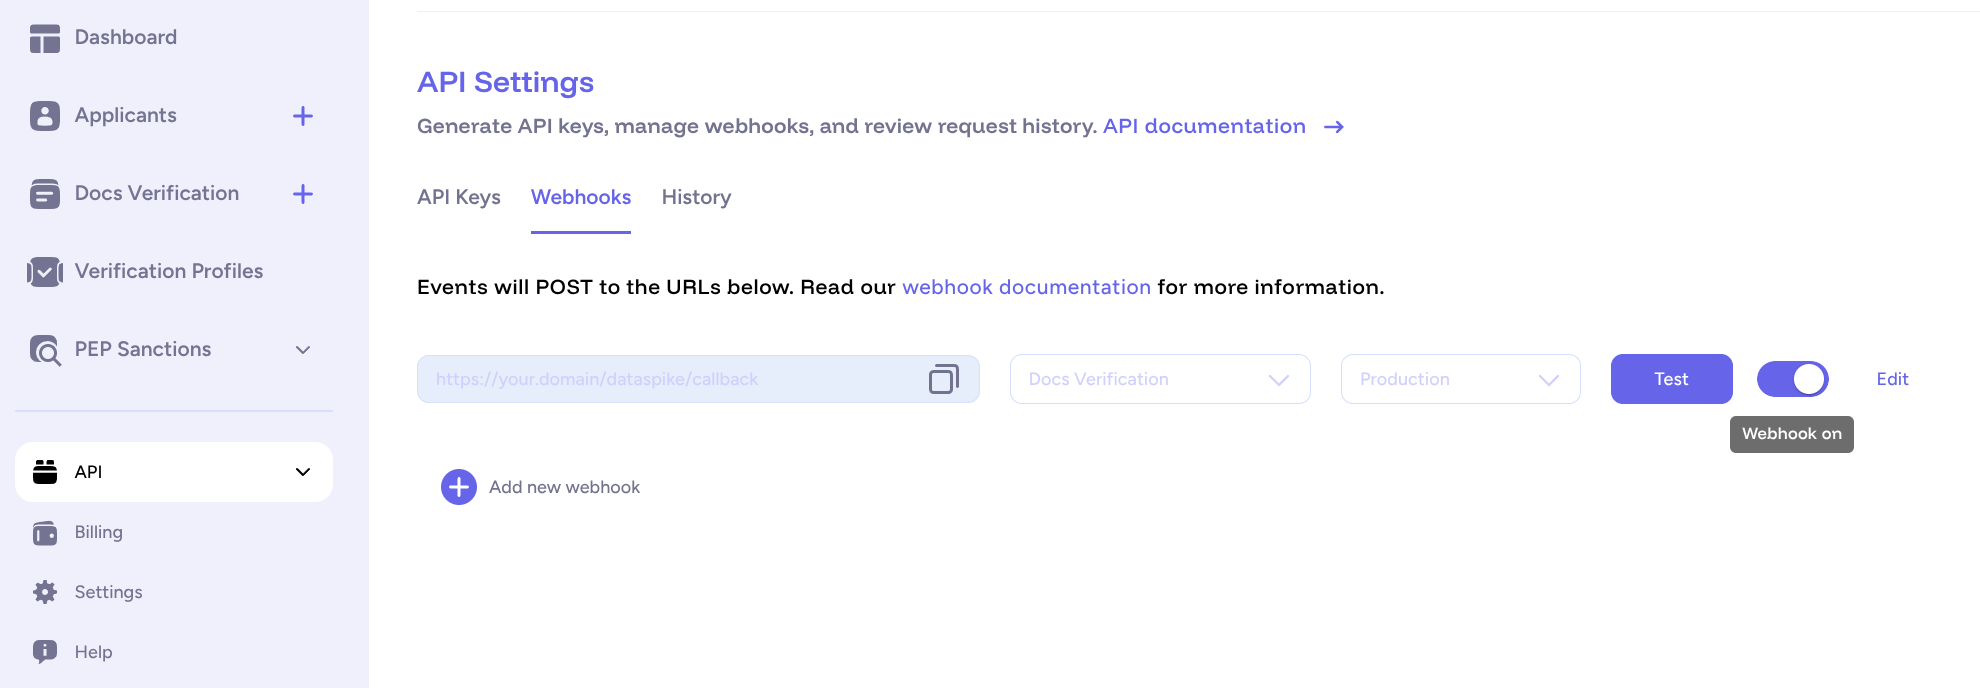 > The **Webhooks** panel lets you configure endpoints, enable or disable them, and test delivery using simulated events.
***
## 3. Next steps
Now that your API key and environment are ready, you can begin exploring Dataspike’s APIs.
Verify government-issued documents and selfies using the Verification API.
Perform AML and sanctions checks against global watchlists using the Screening API.
> 💡 **Tip:** You can perform both applicant-based and standalone checks — choose what fits your integration best.
***
Your environment is now configured and ready for integration.\
Next, explore the [API Reference](/api-reference) for endpoint details or continue with the guides above to build your first workflow.
> The **Webhooks** panel lets you configure endpoints, enable or disable them, and test delivery using simulated events.
***
## 3. Next steps
Now that your API key and environment are ready, you can begin exploring Dataspike’s APIs.
Verify government-issued documents and selfies using the Verification API.
Perform AML and sanctions checks against global watchlists using the Screening API.
> 💡 **Tip:** You can perform both applicant-based and standalone checks — choose what fits your integration best.
***
Your environment is now configured and ready for integration.\
Next, explore the [API Reference](/api-reference) for endpoint details or continue with the guides above to build your first workflow.