Webhook Configuration
In this tutorial, we will guide you through the configuration process for Webhooks with the Dataspike AML and Document Verification API. Assuming you are already familiar with the API from the previous articles, Webhooks offer real-time event notifications, enabling you to receive critical updates and optimize your application's response to verification results.
Step 1: Understanding Webhooks
Webhooks are a way for the Dataspike API to send event-driven notifications to your application when specific events occur. Instead of constantly polling the API for updates, your application can register a webhook URL with Dataspike, and we will make HTTP POST requests to that URL whenever the corresponding events take place.
Step 2: Registering Webhook URLs
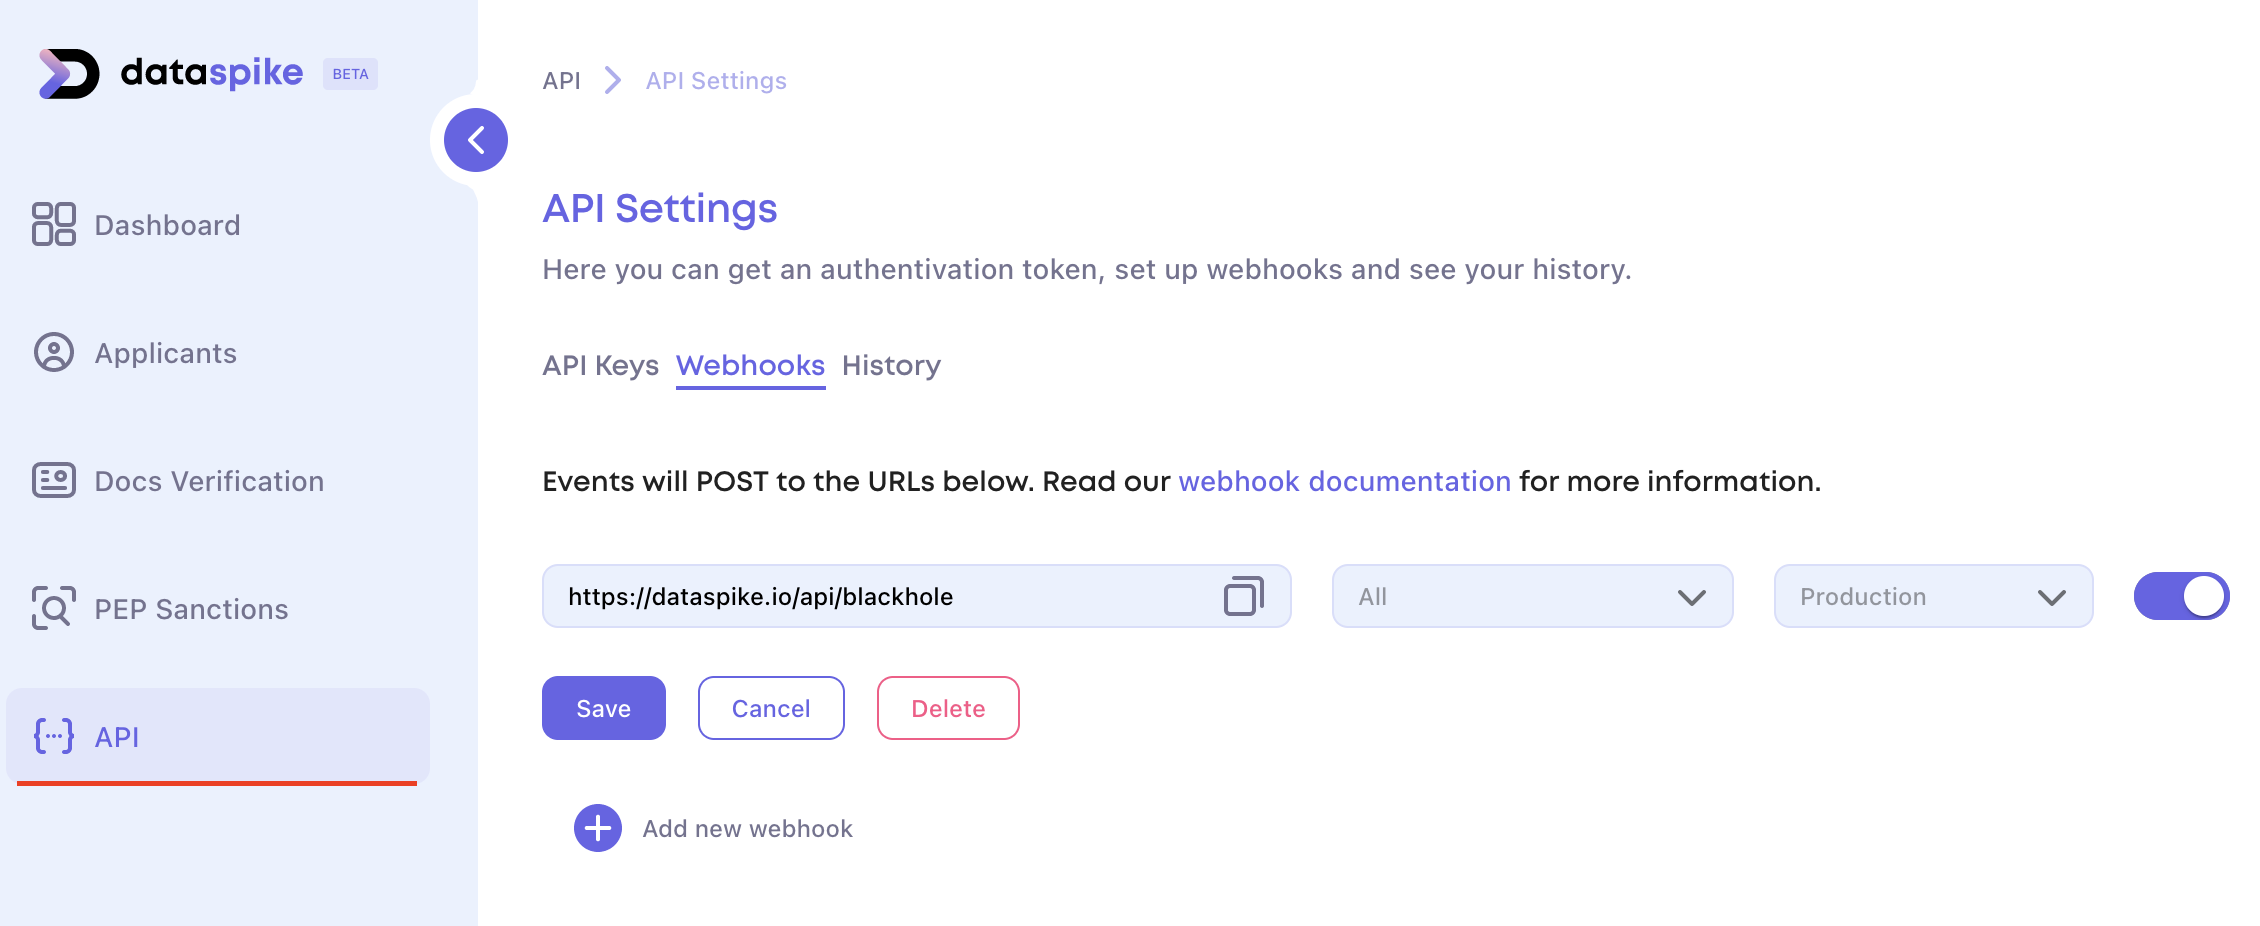
To start receiving webhook notifications, you need to register one or more webhook URLs with Dataspike. These URLs will be where we send the webhook events when the relevant verifications occur. You can register webhook URLs for AML hit notifications and document verification results separately. Please navigate to the Dataspike API Tab and try it yourself:

Step 3: Handling Webhook Events
Once you have registered webhook URLs, your application must be prepared to handle incoming webhook events. These events will contain JSON payloads with relevant data about the verification results or AML hits. Make sure your webhook endpoint is secure and capable of processing the incoming data.
Step 4: Access Webhook History
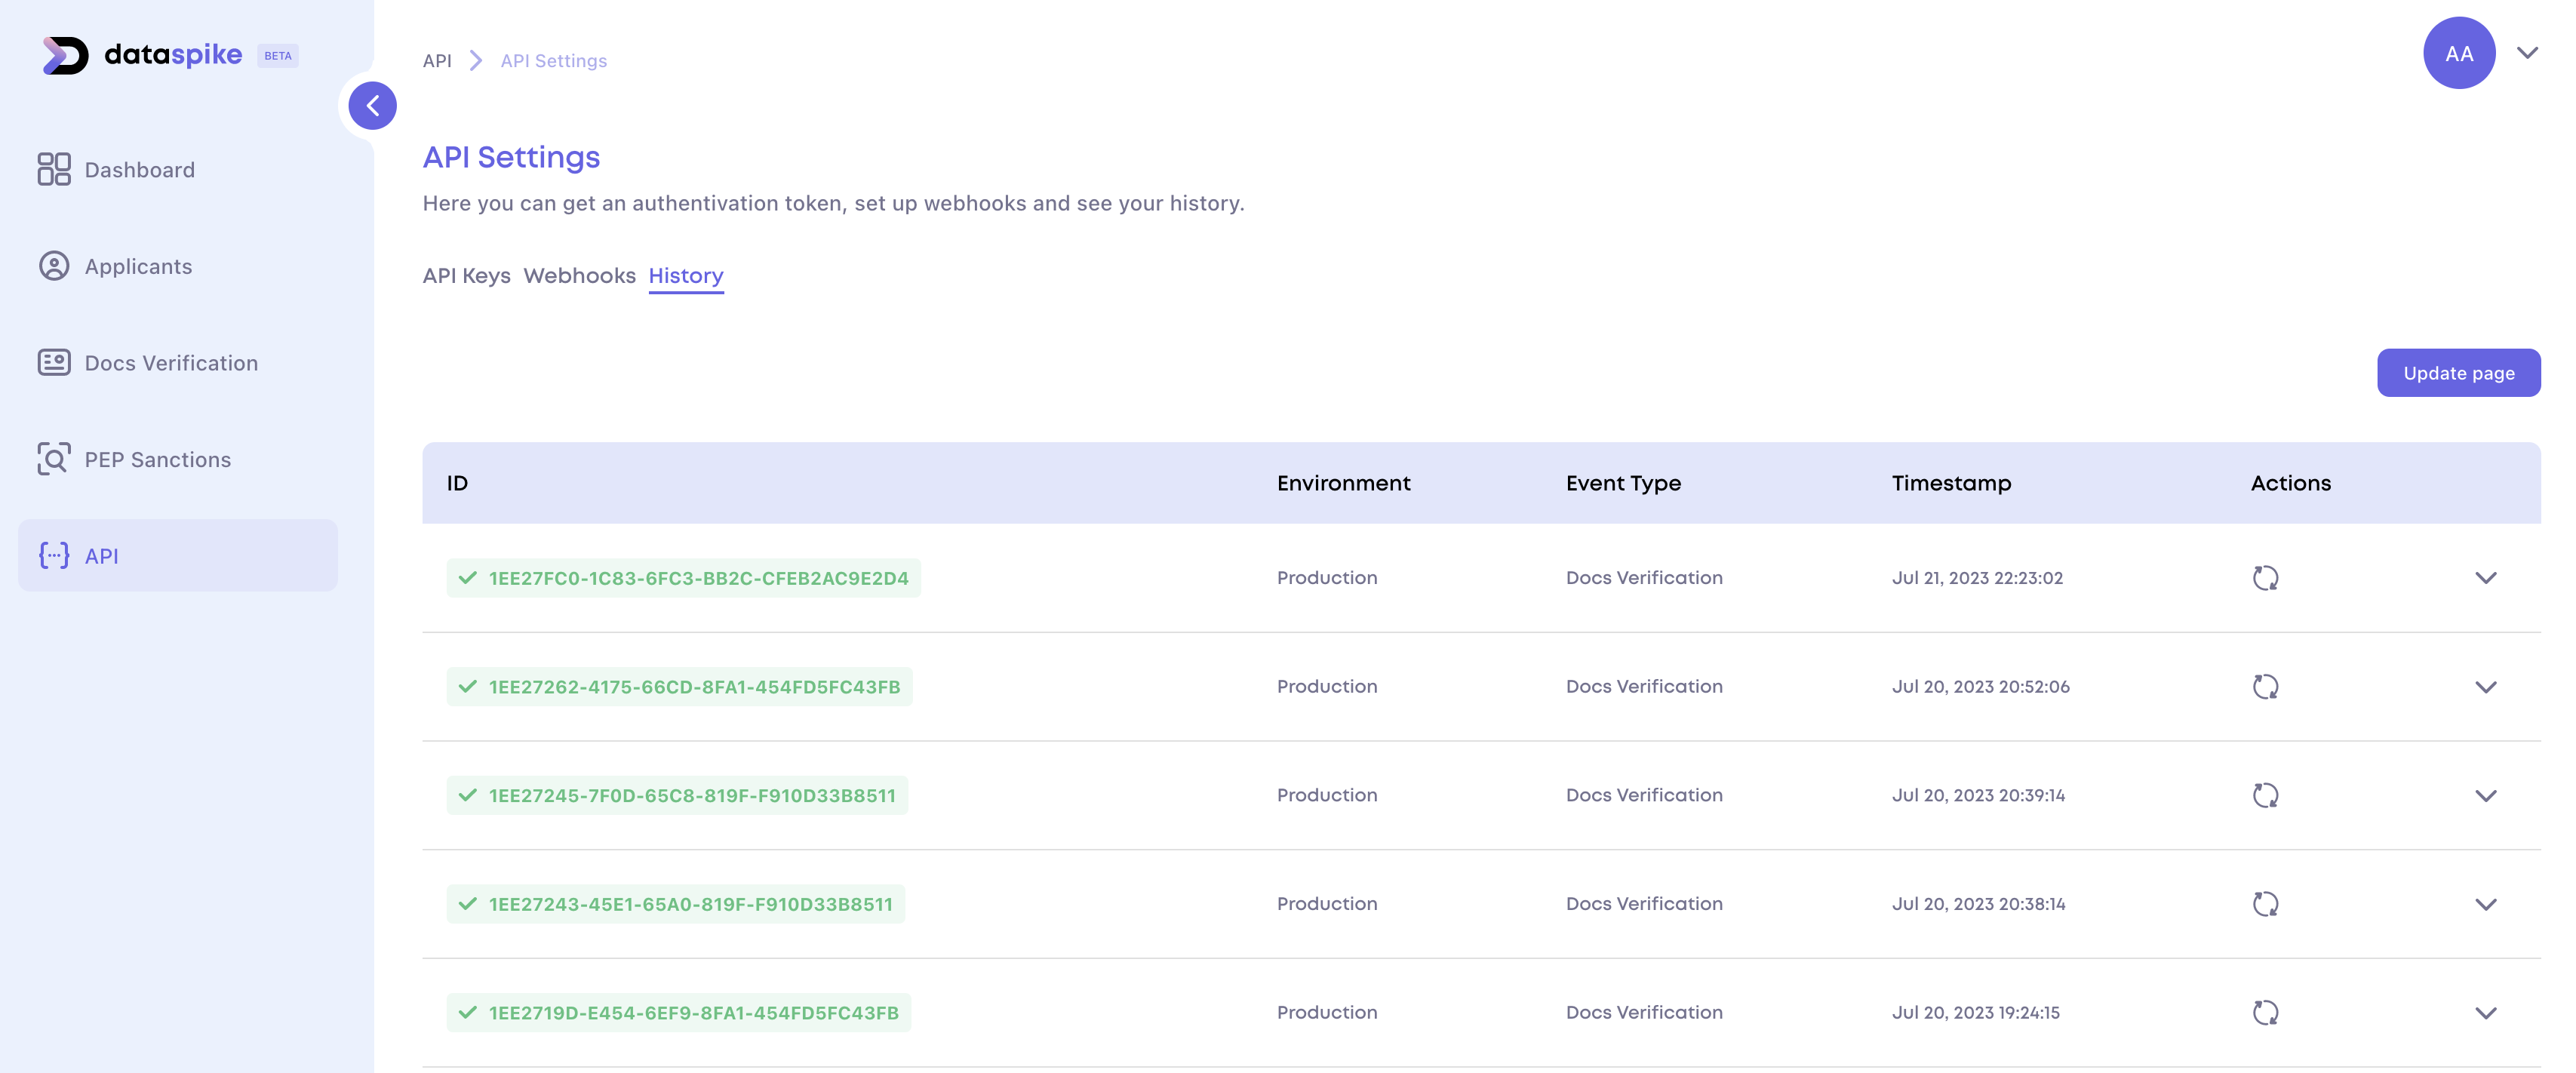
You can conveniently access the webhook history through our dashboard or API. This feature allows you to view successful and failed deliveries, ensuring complete transparency in the webhook process. Moreover, you have the option to manually redeliver events by simply clicking the corresponding button in the dashboard, empowering you with full control over the webhook delivery process.
Step 5: Verifying Webhook (Optional)
For added security, you may choose to verify the integrity of incoming webhook requests by checking their Webhook Configuration ID in the url query - this value sould always match the Webhook ID you created on our dashboard.

Step 6: Testing and Troubleshooting
Before deploying webhook configuration to production, thoroughly test webhook functionality in a development or staging environment. Verify that your application correctly handles webhook events and troubleshoot any issues that may arise during testing.
Congratulations! You have successfully configured Webhooks for the Dataspike AML and Document Verification API. Now your application can receive real-time updates and respond promptly to verification results, providing a seamless and secure verification experience for your users. If you encounter any questions or need assistance, our dedicated support team is here to help at [email protected]. Happy verifying!